Free to determine doorbell position
Easy and quick mounting
Detach and recharge when the battery is low


How to Install:
Step 1: Find a Good Installing Position
Take the Video Doorbell to your front door.
Check the live view on the Philips Home Access app to find the position where you can get the expected field of view.
Recommended mounting height: 48”(1.2m)-55”(1.4m)

If you want to change the camera angle, use the provided 15° Mounting Wedge
which can help position the camera to improve the viewing angle and capture
the area you'd like to view.

⚠️ Attention: It is NOT recommended to install the Video Doorbell at the corner of the wall to avoid obstruction of the side wall and overexposure of the night vision. Avoid installing the Video Doorbell on the door.
Stick the Screw Hole Positioning Card to the wall to mark the position for the screw holes after you decide on the installing position.

Step 2: Install the mounting bracket
If the installing position is a soft surface, such as wood, install directly with the provided screws.

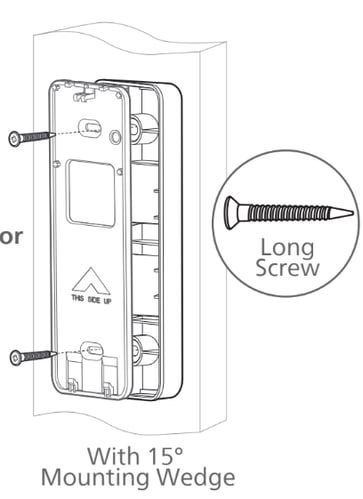
If the installation position is a hard surface, such as stucco, brick, or concrete, drill
two screw holes according to the Screw Hole Positioning Card, then drive into
the provided anchors and install with the provided screws.

Step 3: Attach the Video Doorbell
If the installation position is a soft surface, such as wood, install directly with the
provided screws.
Align the bottom of the Video Doorbell and the Mounting Bracket, then snap the
top until you feel it click into place.Test the Video Doorbell to make sure it is securely mounted.

Was this article helpful?
Yes No